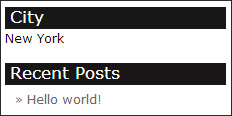
This tutorial will cover how to add a select box to the widget backend options panel. Sometimes a simple text input field is not enough. By understanding this article you will gain a better view of widget backend options.
If you need a basic tutorial on how to create a simple widget, you should read our previous article: Creating a WordPress text widget
Creating a City selector
Let’s say you need a widget to display the selected city on the frontend.
public function form( $instance )
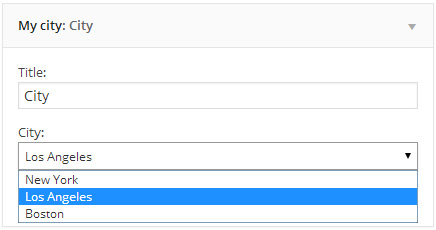
First of all, you need to add the select box to the form function of the widget. This function is responsible for the administrator output on the backend:
  public function form( $instance ) {
     // PART 1: Extract the data from the instance variable
     $instance = wp_parse_args( (array) $instance, array( 'title' => '' ) );
     $title = $instance['title'];
     $city = $instance['city'];

     // PART 2-3: Display the fields
     ?>
     <!-- PART 2: Widget Title field START -->
     <p>
      <label for="<?php echo $this->get_field_id('title'); ?>">Title:
        <input class="widefat" id="<?php echo $this->get_field_id('title'); ?>"
               name="<?php echo $this->get_field_name('title'); ?>" type="text"
               value="<?php echo attribute_escape($title); ?>" />
      </label>
      </p>
      <!-- Widget Title field END -->

     <!-- PART 3: Widget City field START -->
     <p>
      <label for="<?php echo $this->get_field_id('text'); ?>">City:
        <select class='widefat' id="<?php echo $this->get_field_id('city'); ?>"
                name="<?php echo $this->get_field_name('city'); ?>" type="text">
          <option value='New York'<?php echo ($city=='New York')?'selected':''; ?>>
            New York
          </option>
          <option value='Los Angeles'<?php echo ($city=='Los Angeles')?'selected':''; ?>>
            Los Angeles
          </option>
          <option value='Boston'<?php echo ($city=='Boston')?'selected':''; ?>>
            Boston
          </option>
        </select>
      </label>
     </p>
     <!-- Widget City field END -->
     <?php
  }
As you can see the function is divided to 3 parts:
- Part 1: Getting the instance, parsing the arguments, the title and the city (if already set)
- Part 2: Displaying the title field
- Part 3: Displaying the city select field
In this example I use the same option values as the display values (“Los angeles” => “Los angeles”), but you can use numbers or other values as well and store them in an associative array or something similar. It is also possible to display dynamic values from the database if you want to. (with a simple foreach)
Saving the values
This function is generally the same as always:
  function update($new_instance, $old_instance) {
    $instance = $old_instance;
    $instance['title'] = $new_instance['title'];
    $instance['city'] = $new_instance['city'];
    return $instance;
  }
The $instance[‘city’] variable will hold the selected city value for us.
Displaying the widget
Lets display the widget we just created:
  function widget($args, $instance) {
    // PART 1: Extracting the arguments + getting the values
    extract($args, EXTR_SKIP);
    $title = empty($instance['title']) ? ' ' : apply_filters('widget_title', $instance['title']);
    $city = empty($instance['city']) ? '' : $instance['city'];

    // Before widget code, if any
    echo (isset($before_widget)?$before_widget:'');

    // PART 2: The title and the text output
    if (!empty($title))
      echo $before_title . $title . $after_title;;
    if (!empty($city))
      echo $city;

    // After widget code, if any
    echo (isset($after_widget)?$after_widget:'');
  }