I’m sure most if not every developer is using some kind of local server tool for development. The greatest advantage of using local development server is that you don’t depend on a hosting provider, and it works without internet as well (in most cases).
I’ve been using XAMPP for a very long time, as it was very comfortable to use, and it just simply worked. It has more than enough features for a simple WordPress developer – since most hosting companies use very similar configurations to XAMPP.
Vagrant
Vagrant is a very easy to use command line tool with lots of unique and great features. It allows you to emulate any types of virtual development environments. It basically wraps a virtualization software, and a configuration management software together.
How is this any useful, you might ask? Well, imagine you have folders on your computers with different configuration files for different types of web servers. With a single command –
vagrant up
– you can tell Vagrant to start up any of these servers as a virtual machine in the background, and you can access their wen folder in your browser on an address you define. For example you can have test virtual servers on:
- test-1.local
- test-2.local
- ….
- test-n.local
addresses, each with any configuration you want.
A quick Vagrant how-to
I’m sure you can use google to look up more information, so instead of explaining everything, let me show you a very quick vagrant tutorial.
Before you start, you will need to install these things for this tutorial:
Make sure you installed all of these tools first, if so, you are ready to go!
Step 1 – Select a Vagrant file & additional plugins
Vagrant creates everything based on a vagrant file. Usually people share these configuration files as a git hub repositories, which is a great thing of course. As a sample we are going to use a LAMP server configuration from this repository.
Before that however we are going to install additional plugins first. Open up your command line (in administrator mode) and run the following commands:
vagrant plugin install vagrant-berkshelf
vagrant plugin install vagrant-hostmanager
vagrant plugin install vagrant-omnibus
Step 2 – Getting the vagrant file from the git repo
Create and navigate to a folder of your choice – where you want to store your Vagrant configurations and shared folders. I’m on a windows machine, so for the convenience I’m choosing the c:\vagrant folder for this task.
After navigating to the correct folder, run this command:
git clone https://github.com/WPDreams/vagrant-lamp-bootstrap lamp
This will crate a new folder “lamp” in your current directory and copy the git repository files there.

Go ahead and navigate to that folder with the:
cd lamp
command. You can run dir or ls command depending on your system to check if the directory is indeed not empty.

Please notice and check the file named Vagrantfile in this directory. It’s holding the key configuration, which you can edit to your needs.
Step 3 – Run Vagrant
You heard it right, everything is ready, all you need to do is run the
vagrant up
command in the newly created lamp directory. After a few minutes the new environment boots up.

You can access the newly created server from your browser on the 192.168.33.22 address or on the http://test.local/ url.
NOTE: test.local might not work at first. Try refreshing the browser a couple of times or even restarting your computer and running vagrant up again.

Step 4 – Accessing the public_html directory
As you noticed, the current web directory is empty. To add scripts, use the public_html directory in your newly created lamp folder:

To install WordPress, copy the WordPress files to this public_html directory. This folder is shared with the vagrant virtual box. Changes on this folder are permanent.
Step 5 – Accessing your database via phpMyAdmin
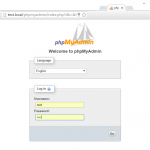
There are several ways to access your database, but this box has phpMyAdmin installed. There are probably better solutions, but in this case it’s more than sufficient. To access phpMyAdmin interface use the http://test.local/phpmyadmin/ url.
The login name and password is: root
This is also your database username and password.
Step 6 – Install WordPress or anything you want
Since now you have access to the web directory and the database, you can copy/paste the WordPress files and begin the installation. Don’t forget to create a database for WordPress before you start.
That’s it! Now you have your own LAMP stack running, with minimal overhead. The greatest advantages:
- You can use Dropbox or any cloud based storage service to synch your vagrant (or just public_html) folder, without unnecessary files
- You can re-create this test environment as many times as you want in different folders – you can edit the Vagrantfile in case you want different configuration
- You can use different Boxes – Google “vagrant boxes” for repositories
If you like how Vagrant works, make sure you do some more research in this topic. This tutorial was only to demonstrate the ease of use of this great tool.


Comments 3
hi Ernest,
Why should I use Vagrant instead of just VirtualBox?
thanks 🙂
Author
Hi!
Vagrant is quicker disposable and re-creatable. You can configure the VM from outsite the box, and you don’t have to bother with folder sharing. Also the networking is a big plus, since you can immediately access the web server after creation.
It’s basically a special case of VirtualBox, mainly made for web development.
Hi – i have xampp installed and running about 10 wp sites locally.
Can you speak to the compatibility issues i would run into, before let’s say i were to migrate them to this environment?
thanks, ed